Table of Contents
- Introduction
- The Step-by-Step Guide: choose your own adventure
- Step 1: The CI server
- Step 2: Setup the GitHub Actions Runner software
- Step 3: make your runner into a service
- Step 4: check it now appears in your self hosted servers
- Step 5: Install docker to allow you to use containerised services in your workflows
- Step 6: prepare your Ruby etc runtimes using asdf
- Step 7: repeat for all servers you want to configure as Runners
- Step 8: optional steps and configuration
- Step 9: Setup or update your GitHub Actions Workflows
Introduction
The first part of our migration from Hatchbox V1 (‘Classic’) to Hatchbox V2 was to migrate our ‘dev’ cluster.
Our existing staging environment setup uses an Amazon AWS EC2 instance which is part of a Hatchbox server cluster that runs our staging, demo and test app deployments.
However, it also acts as a self-hosted runner for our Continuous Integration (CI) environment based on GitHub Actions workflows.
With the introduction of Hatchbox V2, we wanted to maintain the same approach using one of more servers managed by the latest Hatchbox as our GitHub Actions runners.
Our previous setup used a t3.xlarge instance to provide enough CPU/RAM resources to run a number of Rails app instances side-by-side and leave enough space to run the CI.
In our quest for better performance and cost-efficiency, we discovered that the new t4g AWS instances use ARM-based Graviton2 processors, which offer significantly improved CPU performance compared to the t3 class of x64 CPUs. Since our test suite is often CPU-bound, this enhancement is a welcome addition. For benchmarks and cost-effectiveness comparisons, see these articles.
However, while setting up the new cluster and its t4g.xlarge instance, we encountered several issues, particularly due to the fact we are now working with Linux ARM64 (aarch64) boxes.
This blog post aims to provide a step-by-step guide on how to set up EC2 instances as GitHub Action self-hosted runners for Rails workflows using Hatchbox V2, while addressing the challenges of working with Linux ARM64 machines.
Self-Hosted Actions Runners
GitHub Actions self-hosted runners are a way to run your GitHub Actions workflows on your own infrastructure, rather than relying on GitHub’s shared runner resources.
This can be useful when you have specific resource requirements, want more control over the environment, need to consolidating costs or parallelising workloads more efficiently.
We were looking to speed things up with our test suite and consolidate costs. Using the standard runners was costing us about $90 each month. So, I figured that money could be better spend on a larger AWS instance which we could use as a self-hosted runner, giving our CI a nice performance boost at the same time.
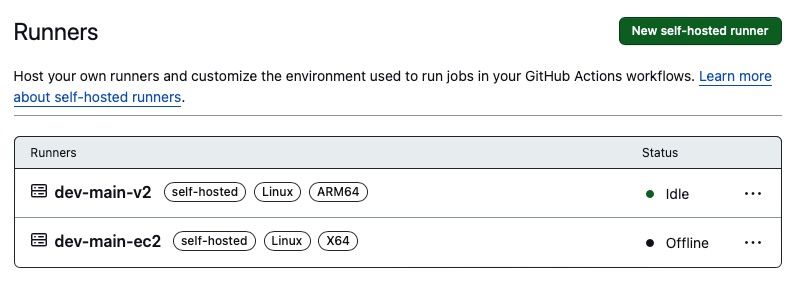
GitHub Actions supports adding self-hosted runners
Challenges with ARM64 Architecture and Linux
ARM64 architecture machines running Linux present some challenges.
To determine the architecture of your instance, SSH in and use arch
arch
# aarch64
Issues we came across:
- Selenium lacks default support for Linux ARM64 (as highlighted in the Selenium documentation). The solution was found after trawling GitHub issues and requires installing rust and compiling from scratch.
- Google Chrome surprisingly does not have Linux ARM64 builds. So we will need to use a build of Chromium/chromedriver as alternatives.
A few assumptions
The Step-by-Step Guide: choose your own adventure
This guide presents a few types of scenarios:
- Utilizing an existing cluster and server that has been previously configured in Hatchbox, such as one that is currently running your staging applications.
- Employing one or more dedicated servers as your Runners, and how to use multiple Runners to parallelise jobs.
- Both X64 and ARM64 architecture instances
So, simply follow each step, and follow the instructions that are appropriate to your setup.
Step 1: The CI server
Before diving into the different scenarios, it’s important to note that the choice of EC2 server instance type will depend on your specific needs and requirements.
Choosing X64 based machines generally simplifies the setup process and will ensure wide support across native libraries, apps and gems. Choosing ARM64 based instances will give you a lower running cost and higher CPU performance, but more issues with native builds.
If you opt for ARM64-based instances (Linux aarch64 machines), such as those powered by AWS Graviton2, this guide will provide what you need to ensure a typical Rails CI setup works correctly.
Scenario A: use an existing server for GitHub Actions
If you have an existing cluster and server, created using Hatchbox, you can use it as a self-hosted runner for your CI environment.
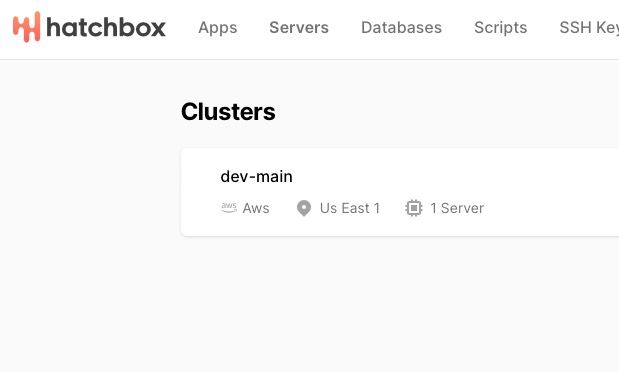
A cluster on Hatchbox
Just ensure that the machine has enough resources available to run your CI tasks efficiently alongside whatever else is deployed to the machine. If you need to scale up your instance, you can do that now.
Scenario B: in an existing cluster, create a new server for GitHub Actions
If you already have an existing cluster and want to dedicate a separate server specifically for GitHub Actions, you can create a new server within the existing cluster.
This approach allows you to separate your CI environment from your application servers, providing better resource allocation and management.
However remember that your CI should live in a separate cluster to your production servers!
Simply navigate to the cluster in Hatchbox and click on ‘Add a server’.
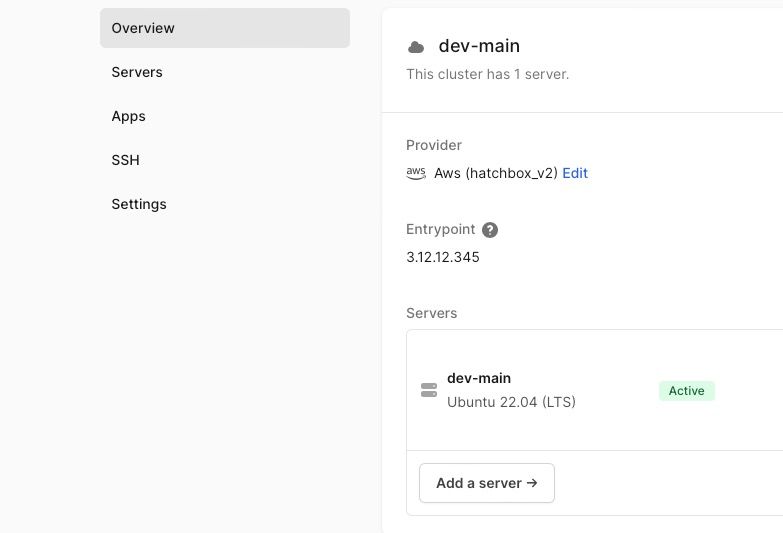
Add a server on Hatchbox to an existing cluster
Name the server, choose the instance type and volume size, and Server Responsibilities which in this case might include the necessary database types needed for your test suite, eg Postgres, Elasticsearch etc. Note however you can leave them blank and run your needed services in docker containers as specified by your workflow.

Servers can be added to Hatchbox clusters that have no specific responsibilities
Scenario C: create a new cluster for both your apps and GitHub Actions runners
Alternatively, you have the option to create a new cluster and server for your applications and the GitHub Actions CI. Take this approach if you are in the initial stages of using Hatchbox and have not yet established any setup and want to consolidate all your development resources on one single server.
In this case, start by setting up a cluster in Hatchbox, https://app.hatchbox.io/clusters/new and provide your IAM user details. See more at https://hatchbox.relationkit.io/articles/6-amazon-ec2
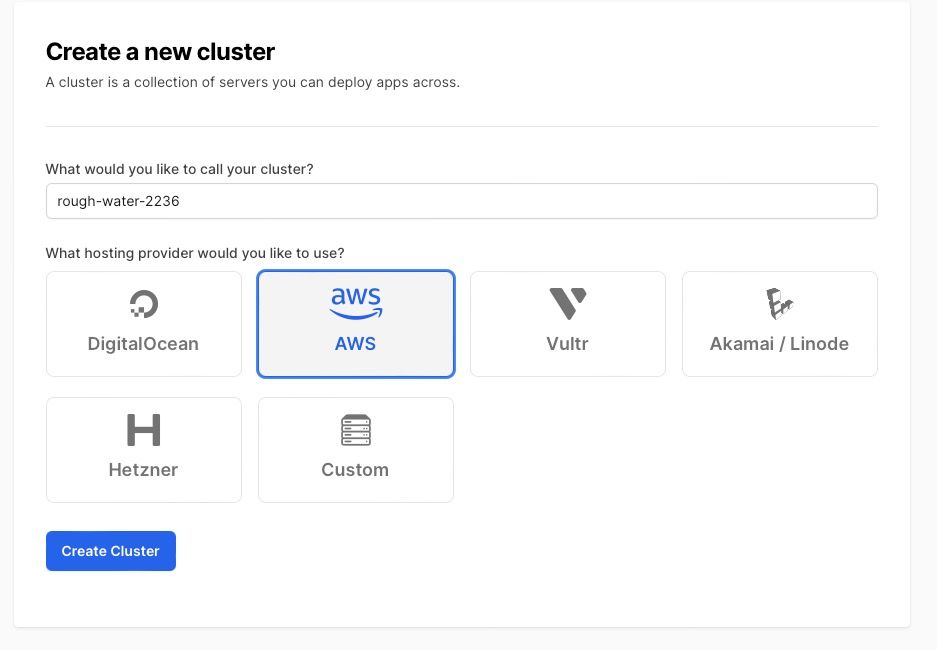
Set up a new Hatchbox Cluster on EC2
Note that when creating the cluster, you are asked about the VPC to put the server in. If you opt to create new VPCs, remember that Amazon has a limit (5 per region), so you might need to add the cluster to an existing one (but make sure its appropriate from a security standpoint!)
Now create your server, following the Hatchbox guide, ensuring you pick the right server type and responsibilities needed for the machine.
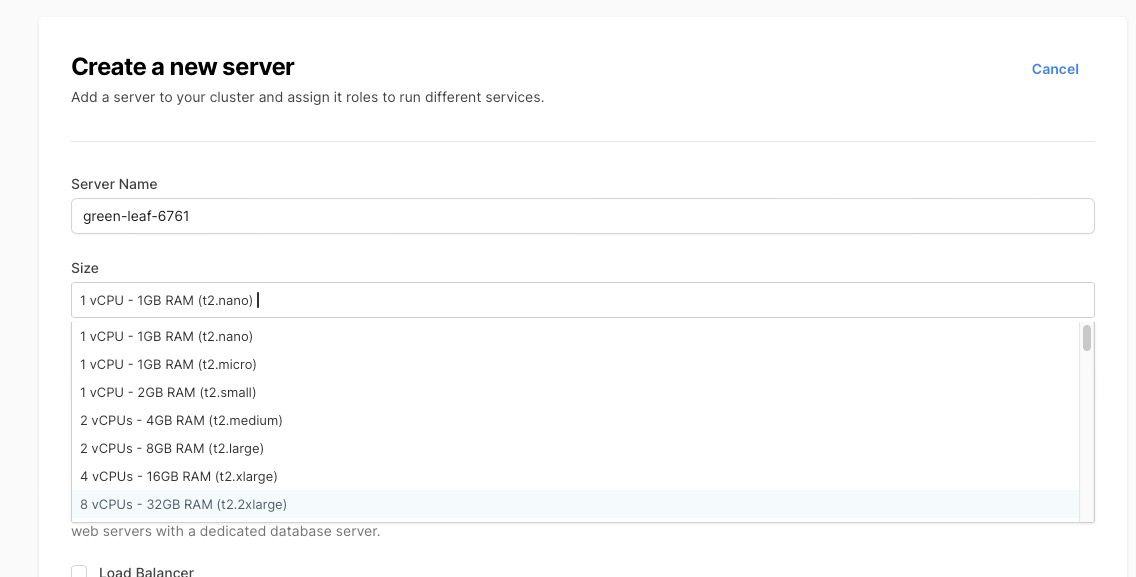
Create a server and pick the correct instance type. This guide also includes instructions on using ARM64 instances.
For the responsibilities, in the case of a dev machine that will run your staging Rails apps say, select Web Server, Cron, Background Worker, and your desired database types.
Note that if you plan to deploy multiple apps and run the CI on this server, you will need a large enough EBS Volume (disk storage). We initially chose 50GB, but it quickly filled up, so we now use 100GB. This is because we store several artifacts on the machine, and Hatchbox keeps multiple previous versions of each app (allowing for rollbacks), each with its own set of gems and node packages, which can consume a significant amount of disk space.
Scenario D: create a new cluster dedicated only to GitHub Actions runners
In this scenario, you can create a new cluster with a server dedicated solely to the GitHub Actions.
This approach is ideal if you want to keep your CI environment completely separate from your application servers and other resources. By doing so, you can ensure that your CI tasks do not interfere with your application deployments and can be managed independently.
In this case, start by setting up a cluster in Hatchbox:
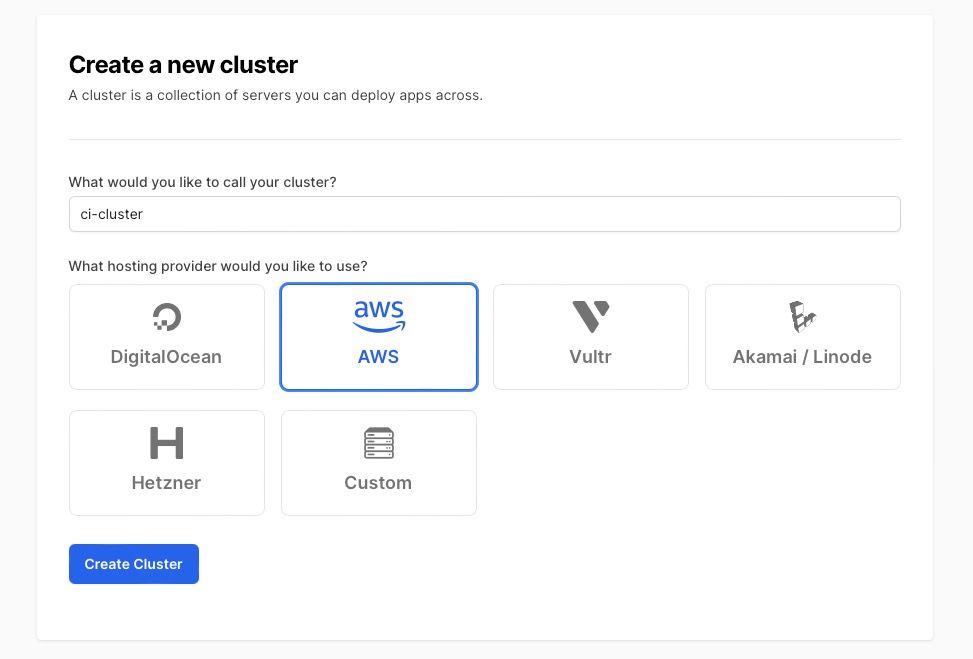
Create a new cluster on Hatchbox for the CI
Now, add one or more servers to the new cluster (see later on how you might use multiple runners) with the “Add a server” button.
You will need to name the servers, choose their instance types and volume sizes, and select any Server Responsibilities you need for your CI.
The responsibilities you may require will depend on your specific needs. For example, if you want to use database services such as MySQL running directly on the server, then you will need to select the appropriate database types. Note however, you can leave the Responsibilities blank and deploy no services to the boxes. This will be the case when your CI only depends on services which are used via Docker containers, as specified in your Actions workflow services: section.
Note, when creating the VPC, remember that Amazon has a limit of 5 per region.
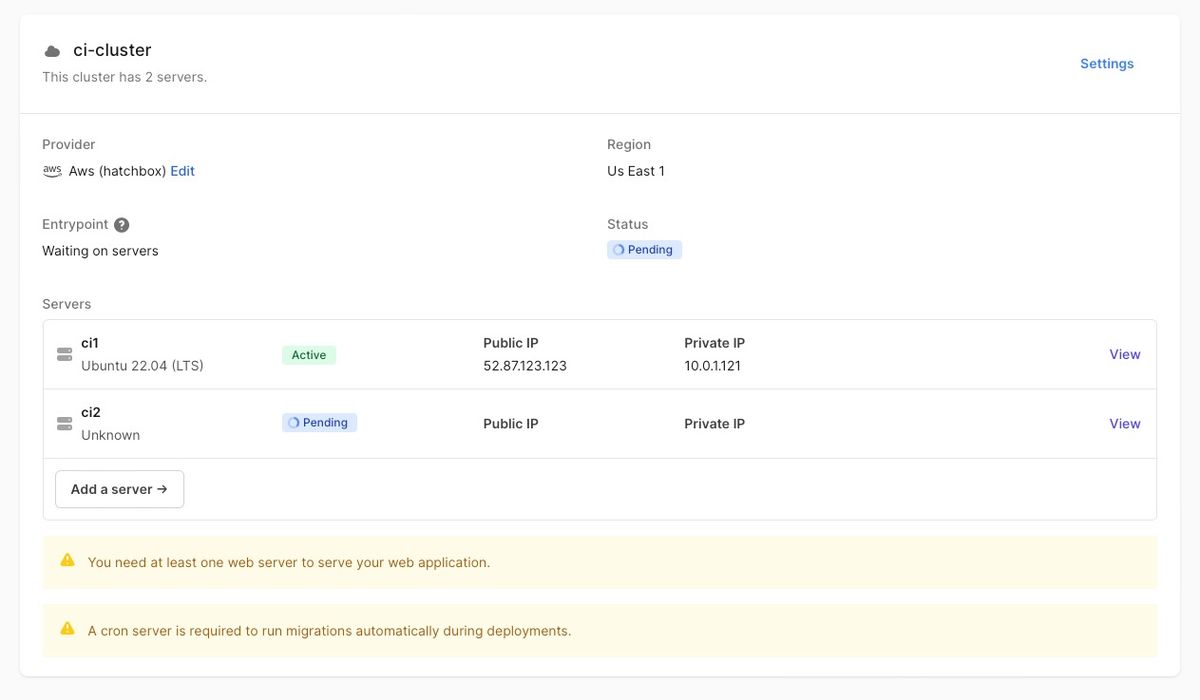
Servers in a dedicated cluster for use as GitHub Actions runners
Step 2: Setup the GitHub Actions Runner software
This GitHub guide will lead you through installing the software that registers the instance as a GitHub Runner for your organisation or individual project.
For example, here we will setup a Runner at the organisation level.
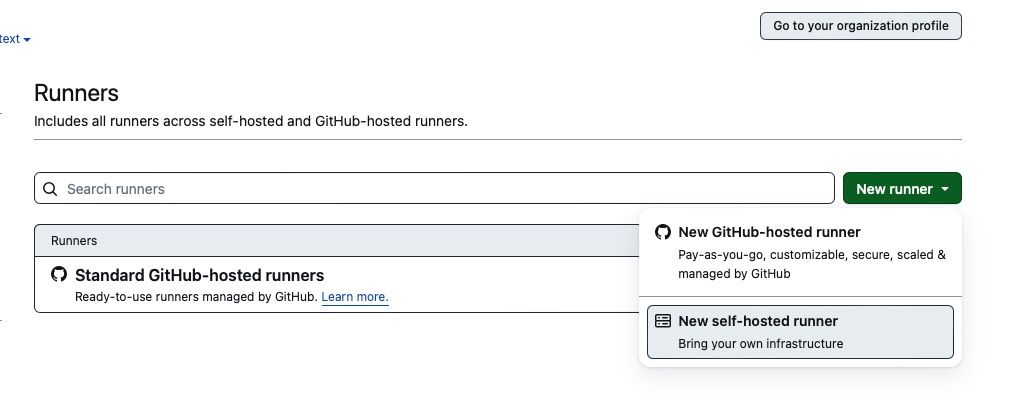
Adding a new Actions runner in GitHub under an Organization
Now SSH in to your server, and follow the install steps provided by the “Add self hosted runner” flows in GitHub, (make sure to select Linux and the correct architecture of your instances)
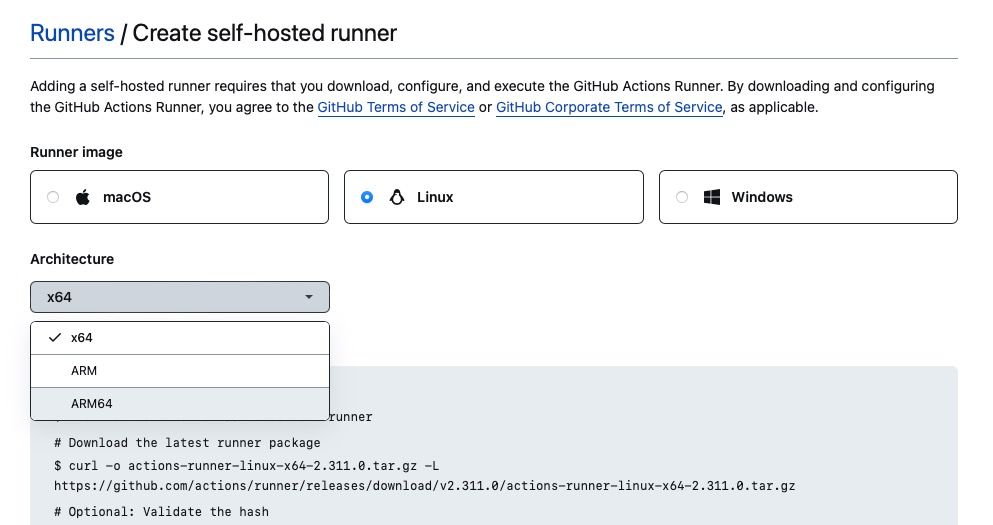
Choose the correct OS and instance architecture when setting up the self-hosted Actions runner in GitHub
For me, it was as follows but for you it will depend on your architecture and the current version of the actions-runner!
mkdir actions-runner && cd actions-runner

curl -o actions-runner-linux-arm64-2.311.0.tar.gz -L https://github.com/actions/runner/releases/download/v2.311.0/actions-runner-linux-arm64-2.311.0.tar.gz

tar xzf ./actions-runner-linux-arm64-2.311.0.tar.gz

./config.sh --url https://github.com/MyOrg --token MYTOKEN
and then you manually run through the configuration process:
--------------------------------------------------------------------------------
|        ____ _ _   _   _       _          _        _   _                      |
|       / ___(_) |_| | | |_   _| |__      / \   ___| |_(_) ___  _ __  ___      |
|      | |  _| | __| |_| | | | | '_ \    / _ \ / __| __| |/ _ \| '_ \/ __|     |
|      | |_| | | |_|  _  | |_| | |_) |  / ___ \ (__| |_| | (_) | | | \__ \     |
|       \____|_|\__|_| |_|\__,_|_.__/  /_/   \_\___|\__|_|\___/|_| |_|___/     |
|                                                                              |
|                       Self-hosted runner registration                        |
|                                                                              |
--------------------------------------------------------------------------------

# Authentication


√ Connected to GitHub

# Runner Registration

Enter the name of the runner group to add this runner to: [press Enter for Default]

Enter the name of runner: [press Enter for ip-10-0-1-64] ci-runner-1

This runner will have the following labels: 'self-hosted', 'Linux', 'ARM64'
Enter any additional labels (ex. label-1,label-2): [press Enter to skip]

√ Runner successfully added
√ Runner connection is good

# Runner settings

Enter name of work folder: [press Enter for _work]

√ Settings Saved.


deploy@ip-10-0-1-64:~/actions-runner$ ./run.sh

√ Connected to GitHub

Current runner version: '2.311.0'
2024-01-18 11:14:41Z: Listening for Jobs
Once you get to the final ./run.sh command, you need to use Ctrl-C to shutdown the runner, and then set it up as a service.
Step 3: make your runner into a service
Follow the guide on GitHub to start the runner application as a service so it is started and stopped independently of your shell.
Basically just do
sudo ./svc.sh install deploy
sudo ./svc.sh start
Step 4: check it now appears in your self hosted servers
Visit the Runners page in your organisation or project on GitHub and the runner will be listed
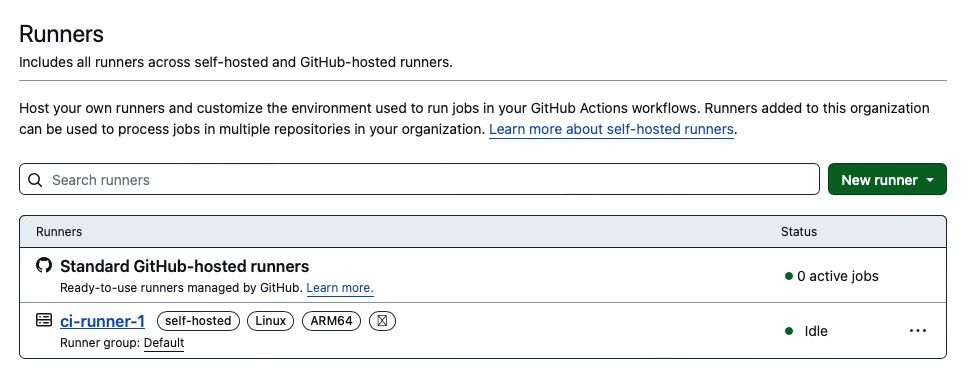
Self-hosted GitHub Actions runners appear listed and ‘idle’ when setup correctly
The tags you specified when configuring the runner can be used in your workflow configuration to indicate what runner each jobs should be allocated to.
Step 5: Install docker to allow you to use containerised services in your workflows
Docker is used to run containerized services that you specify in your GitHub Actions workflows.
Install it by following the guide here: https://docs.docker.com/engine/install/ubuntu/#install-using-the-repository
# Add Docker's official GPG key:
sudo apt-get update
sudo apt-get install ca-certificates curl gnupg
sudo install -m 0755 -d /etc/apt/keyrings
curl -fsSL https://download.docker.com/linux/ubuntu/gpg | sudo gpg --dearmor -o /etc/apt/keyrings/docker.gpg
sudo chmod a+r /etc/apt/keyrings/docker.gpg

# Add the repository to Apt sources:
echo \
  "deb [arch=$(dpkg --print-architecture) signed-by=/etc/apt/keyrings/docker.gpg] https://download.docker.com/linux/ubuntu \
  $(. /etc/os-release && echo "$VERSION_CODENAME") stable" | \
  sudo tee /etc/apt/sources.list.d/docker.list > /dev/null
sudo apt-get update

sudo apt-get install docker-ce docker-ce-cli containerd.io docker-buildx-plugin docker-compose-plugin
Setup your deploy user as a docker group user. Basically you want to do:
sudo usermod -aG docker deploy
And restart the action-runner service:
cd ~/actions-runner/
sudo ./svc.sh stop
sudo ./svc.sh start
Should I use Docker containers for databases or unmanaged DBs on Hatchbox?
You can do either.
If using Hatchbox DBs you have the advantage of already installed services running natively on the instance.
To use Hatchbox DBs, go to https://app.hatchbox.io/database_clusters and for each services you need, eg Elasticsearch, Redis and Postgres (postgis)
For database services that support multiple databases (eg Redis, Postgres, Mysql), click to view the database service, then create a new Database for use by the CI
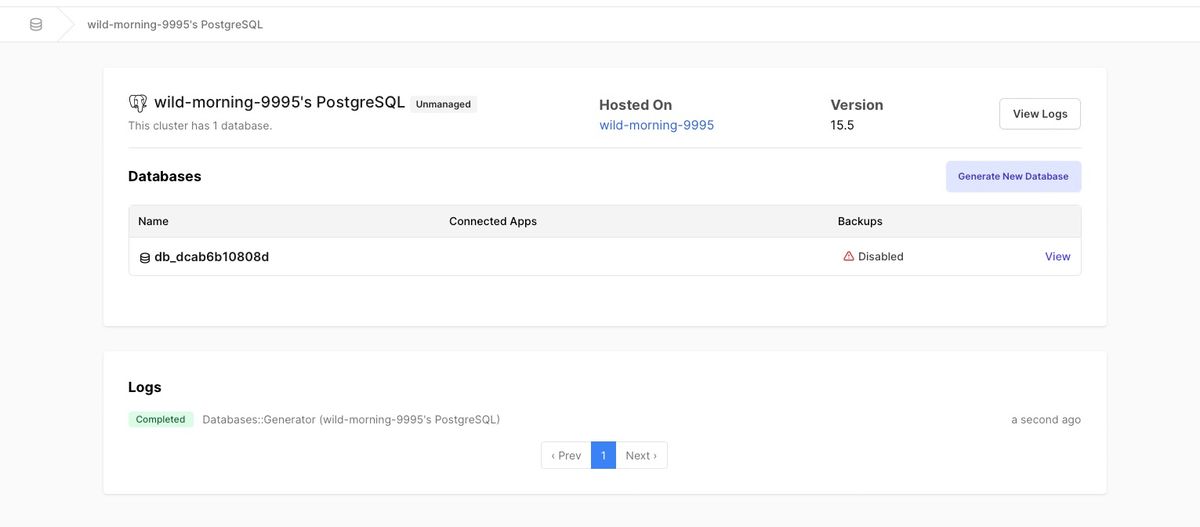
Unmanaged databases setup on your instance by Hatchbox can have multiple databases in them
For Elasticsearch and memcached, you just use the connection URL of the service, as they don’t have the concept of separate databases.
Also for Postgres, if you use Postgis, read on below how to set it up, and don’t forget to change the connection URL protocol to postgis:// instead of postgres://
Step 6: prepare your Ruby etc runtimes using asdf
There are two ways to prepare your Ruby and other runtimes using asdf.
Deploy an App
If you are on a server that will also host your deployed apps, you can simply deploy an app, as Hatchbox will install everything needed to run your app on-demand, including the Ruby version specified by your application and a Node.js runtime. Your deployment may fail, but that’s okay, the runtimes will probably have been installed.
Install manually
Alternatively, if the server is only for running GitHub actions, then we need to install things now.
SSH in to the server, we need to setup asdf. We will use asdf to install what you need.
First, lets add a .tool-versions to the home directory
vi ~/.tool-versions
For Ruby on Rails applications we will set the contents of this file to something like:
# Set the versions to what you need for your application and test suite
ruby 3.3.0
nodejs 18.16.0
Now we will perform the setup steps that Hatchbox performs on a first deploy, combined with those specified in the GoRails Ubuntu setup guide.
Here I have modified slighty to also install rust so we can compile YJIT and later, if needed, selenium manager.
Note you could use Hatchbox Scripts to setup a script with the following, and apply it to setup each server as needed.
# Install Ruby build dependencies
sudo apt-get update
sudo apt-get install git-core zlib1g-dev build-essential libssl-dev libreadline-dev libyaml-dev libsqlite3-dev sqlite3 libxml2-dev libxslt1-dev libcurl4-openssl-dev software-properties-common libffi-dev

# Use the fork of asdf maintained by Chris Oliver
git clone https://github.com/excid3/asdf ~/.asdf

# Hatchbox adds a default `~/.bashrc` but we need to configure asdf too:
sed -i '1i. $HOME/.asdf/asdf.sh' ~/.bashrc

echo 'legacy_version_file = yes' >> ~/.asdfrc

source ~/.bashrc

# NodeJS
/home/deploy/.asdf/bin/asdf plugin add nodejs
/home/deploy/.asdf/bin/asdf nodejs update-nodebuild

# Rust
/home/deploy/.asdf/bin/asdf plugin-add rust
/home/deploy/.asdf/bin/asdf install rust latest
/home/deploy/.asdf/bin/asdf global rust latest

# Ruby with YJIT
export RUBY_CONFIGURE_OPTS=--enable-yjit
/home/deploy/.asdf/bin/asdf plugin add ruby

# Now asdf will install the versions specified in our ~/.tool-versions
/home/deploy/.asdf/bin/asdf install

# Dont install docs with gems
echo 'gem: --no-document' >> /home/deploy/.gemrc
# We can update our gems too
~/.asdf/installs/ruby/3.3.0/bin/gem update --system
/home/deploy/.asdf/bin/asdf reshim ruby 3.3.0
/home/deploy/.asdf/bin/asdf local ruby 3.3.0

npm install -g yarn
Test it works:
ruby -e "puts 'Hi'"
# Hi
node -e "console.log('Hi')"
# Hi
To update your runtimes in future, run the following updates before installing new versions:
/home/deploy/.asdf/bin/asdf update --head
/home/deploy/.asdf/bin/asdf nodejs update-nodebuild
/home/deploy/.asdf/bin/asdf plugin update nodejs
/home/deploy/.asdf/bin/asdf plugin update ruby
/home/deploy/.asdf/bin/asdf plugin update rust
Step 7: repeat for all servers you want to configure as Runners
Once you have successfully set up one server as a GitHub Actions Runner, you can repeat the process for any additional servers you want to configure as Runners. Simply follow Steps 1-6 for each server, ensuring that you use the appropriate tags and configurations for each one.
Step 8: optional steps and configuration
Install chrome/chromium browser, chromedriver and selenium for your system specs
If using X64 architecture instances, such as t3:
then you need simply follow the install instructions from the Google Chrome package repository.
wget -q -O - https://dl-ssl.google.com/linux/linux_signing_key.pub | sudo apt-key add -
sudo sh -c 'echo "deb [arch=amd64] http://dl.google.com/linux/chrome/deb/ stable main" >> /etc/apt/sources.list.d/google.list'
sudo apt-get update
sudo apt-get install google-chrome-stable
If using ARM64 architecture instances, such as t4g
you will need to install Chromium browser instead, as Google Chrome is not available for ARM64. To do this, follow the instructions below:
sudo apt install xdg-utils chromium-browser chromium-chromedriver
You should now reboot your instance:
sudo reboot
After rebooting (will take a few seconds), SSH back in (as the deploy user, as usual).
Then enable “linger” for the deploy user sessions:
loginctl enable-linger deploy
To test the installation, check the versions:
chromium-browser --product-version
# 120.0.6099.199

chromedriver --version
# ChromeDriver 120.0.6099.199 (4c400b5eade71f580ad9e320a2c4634dc5a0a0f9-refs/branch-heads/6099@{#1669})
Assuming Chromium reports its version, you can test running it in headless mode with:
$ chromium-browser --headless --remote-debugging-port=9222 https://chromium.org/
You should see DevTools listening on ws:...
Exit with Ctrl-C
Possible errors you might see…
If, when executing Chromium, you see:
/system.slice/actions.runner.Org.ci-runner-1.service is not a snap cgroup
you need to do
loginctl enable-linger deploy
or if you see:
internal error, please report: running "chromium" failed: transient scope could not be started, job /org/freedesktop/systemd1/job/405 finished with result failed
you need to reboot your instance.
Installing Selenium is next:
If using X64 instances, the selenium-webdriver gem will handle things for you automatically.
If using Linux ARM64 then unfortunately you can’t rely on the selenium-webdriver gem managing your browser and driver as the new Selenium Manager does not support the platform.
Instead you will need to build the selenium manager from source, and then use an environment variable to let the gem know where to find your manager binary:
git clone https://github.com/SeleniumHQ/selenium.git ~/selenium --depth 1
cd ~/selenium/rust
cargo build --release
Now we need to configure the necessary environment variables. Run the following to point to the selenium manager binary and setup the chromedriver location on the PATH:
sed -i '1iexport SE_MANAGER_PATH=~/selenium/rust/target/release/selenium-manager' ~/.bashrc
sed -i '1iexport PATH="/usr/bin/chromedriver:$PATH"' ~/.bashrc
Note these lines are added to the top of .bashrc intentionally, to ensure they are evaluated even if non-interactive shells.
Install ImageMagick for image processing
For Rails image processing install ImageMagick (or VIPS).
sudo apt install imagemagick
Reduce elasticsearch memory usage
If you added the Hatchbox unmanaged Elasticsearch DBs responsibility to the server you might want to tweak its memory usage.
By default , Elasticsearch uses a large amount of memory (50% of your available RAM) which can be reduced by modifying its configuration, since you are unlikely to need that much Elasticsearch storage space for testing purposes.
Add and edit a file in /etc/elasticsearch/jvm.options.d/
sudo vi /etc/elasticsearch/jvm.options.d/custom.options
Add the following to that file to set the default heap size to 2GB and a max heap to 4GB
# JVM Heap Size
-Xms2g
-Xmx4g
then restart the service
sudo systemctl restart elasticsearch
Enable PostGIS on Hatchbox unmanaged Postgres
First, you’ll need to install Postgis.
Make sure to install the version that works for your desired postgres version (eg here its PostgreSQL 15):
sudo apt-get install postgis postgresql-15-postgis-3-scripts
We will then create the Postgis extension in Postgres. First change to the postgres user:
sudo su postgres
You also need to specify the version of postgres (eg 15) here too, else pg_wrapper will pick one which might be different version to that used by your app:
PGCLUSTER=15/main psql
Once inside psql do:
CREATE EXTENSION postgis; CREATE EXTENSION postgis_topology;
which should output:
CREATE EXTENSION
CREATE EXTENSION
To quit psql use:
\q
then exit from the postgres user on the shell to return to the deploy user:
exit
whoami
# deploy
Last up, change your DATABASE_URL env var, via your GitHub Action secrets, or your workflow configuration files, to start with postgis:// instead of postgresql://
Step 9: Setup or update your GitHub Actions Workflows
Next, we will need to set up or update your GitHub Actions workflows .yml to use the newly configured runners.
Configure the Shell
First you must ensure your Actions workflow includes the shell: configuration to ensure the Runner sources ~/.bashrc before any command:
...
defaults:
  run:
    shell: bash -leo pipefail {0}
...
Configuring databases… (using secrets, or workflow, unmanaged vs docker)
As mentioned in a previous section, you can use Hatchbox unmanaged databases, or dockerized services, or both. When I say dockerized services I mean using the services: configuration in your workflow to specify docker images to run as services.
So decide how you want to proceed, and then setup your workflow accordingly.
Using Hatchbox databases
To configure your unmanaged Hatchbox installed databases, you can use Repository Secrets in GitHub. Copy the connection URI from the database details page:

Hatchbox unmanaged database details shows the connection URI for use in your GitHub Actions workflows
And add it to a new action secret, with a name that is unique for the particular runner.
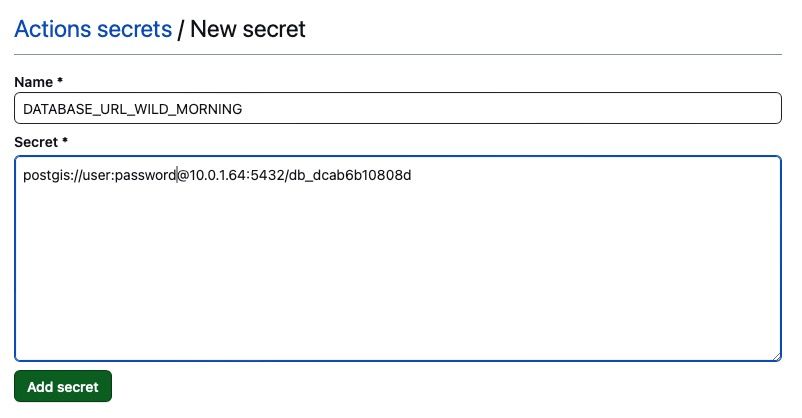
GitHub Actions secrets can be used to configure database connection URLs
In the workflow configure the appropriate Job env var, eg DATABASE_URL for the postgres DB, to be set by the correct secret. If using multiple runners, then make sure you use the correct env var for the given server specified in the runs-on:
jobs:
  test:
    # Configure our job to run on the self-hosted runner
    runs-on: ci-server
    env:
      DATABASE_URL:  ${{ secrets.DATABASE_URL_WILD_MORNING }}
Using dockerized services
Just configure the services: section of your workflow to use the appropriate docker images.
If you use ARM64 instances, make sure that the docker images used in your Workflow have ARM support.
Example Workflow for single runner using Docker services:
name: "Ruby on Rails CI, on Hatchbox-configured self hosted runner"
defaults:
  run:
    # Configure the shell to load .bashrc
    shell: bash -leo pipefail {0}
on:
  push:
    branches: [ master ]
  pull_request:
    branches: [ master ]
jobs:
  test:
    # Configure our job to run on the self-hosted runner
    runs-on: self-hosted

    # You can configure services here that use docker. However, if you just want to use services that Hatchbox provides,
    # for example, Redis, Postgres, Elasticsearch, then you can simply configure the environment variables below
    # and connect to the services on localhost. For example, configure REDIS_URL to the URL provided by Hatchbox in the
    # Database Clusters for unmanaged Redis (create a new DB inside Redis for your workflow).
    services:
      redis:
        # Use a docker image with ARM64 support if you are using an ARM64 runner
        image: redis
        ports:
          # Maps port 6379 on service container to the host, to avoid conflicts with redis server running on the host
          - 6378:6379
        # Set health checks to wait until redis has started
        options: >-
          --health-cmd "redis-cli ping"
          --health-interval 10s
          --health-timeout 5s
          --health-retries 5
      postgres:
        # Here postgis/postgis could be used, but if on ARM64 we must use a docker image with ARM64 support (the official one does not have ARM64 support)
        image: imresamu/postgis:13-3.4
        ports:
          - 5440:5432
        # This is needed because the postgres container does not provide a healthcheck
        options: --health-cmd pg_isready --health-interval 10s --health-timeout 5s --health-retries 5
        env:
          POSTGRES_DB: rails_test_new
          POSTGRES_USER: rails
          POSTGRES_PASSWORD: password
    env:
      # Configure your application environment variables...
      CI: true
      RAILS_ENV: test
      DATABASE_URL: "postgis://rails:password@localhost:5440/rails_test"
      REDIS_URL: "redis://localhost:6378"
      NODE_ENV: production
      RAILS_MASTER_KEY: ${{ secrets.RAILS_MASTER_KEY }}
      RAILS_SERVE_STATIC_FILES: y
      ELASTICSEARCH_URL: ${{ secrets.ELASTICSEARCH_URL }}
    steps:
      # We don't install Ruby on our runner as already installed by Hatchbox
      - name: Checkout code
        uses: actions/checkout@v3
      - name: Cache node modules
        id: cache-npm
        uses: actions/cache@v3
        env:
          cache-name: cache-node-modules
        with:
          # npm cache files are stored in `~/.npm` on Linux/macOS
          path: ~/.npm
          key: ${{ runner.os }}-build-${{ env.cache-name }}-${{ hashFiles('**/package-lock.json') }}
          restore-keys: |
            ${{ runner.os }}-build-${{ env.cache-name }}-
            ${{ runner.os }}-build-
            ${{ runner.os }}-

      - if: ${{ steps.cache-npm.outputs.cache-hit == false }}
        name: List the state of node modules
        continue-on-error: true
        run: npm list

      - name: Install dependencies
        run: npm install
      - name: Setup gems
        run: |
          bundle install

      # Run test:prepare to build assets
      - name: Build assets & prepare for tests
        run: |
          RAILS_ENV=test bin/rails db:reset
          bin/rails test:prepare
      # Since 7.1 also runs test:prepare, but we do it above in the build assets step. So use env var to skip.
      - name: Run tests
        run: |
          SKIP_JS_BUILD=1 SKIP_CSS_BUILD=1 bin/rails test
      - name: Run specs
        run: |
          bin/rails db:test:prepare
          bin/rspec
Multiple runner example using Hatchbox unmanaged Databases:
When using multiple Runners ensure each job is assigned to an appropriate Runner server using unique tags that you assign to the runners when you configure them.
You can then use the env: configuration of each job to setup Runner specific configuration such as service connection URIs.
Here is an example, where the spec suite is split into two groups (using tags), and each group is run on a separate Runner server.
name: "Ruby on Rails CI, on Hatchbox-configured self hosted runners"
defaults:
  run:
    # Configure the shell to load .bashrc
    shell: bash -leo pipefail {0}
on:
  push:
    branches: [ master ]
  pull_request:
    branches: [ master ]
env:
  # Configure environment variables shared across all runners & jobs
  CI: true
  RAILS_ENV: test
  NODE_ENV: production
  RAILS_MASTER_KEY: ${{ secrets.RAILS_MASTER_KEY }}
  RAILS_SERVE_STATIC_FILES: y
jobs:
  test_and_lint:
    name: "Minitest and lint"
    # Configure our job to run on the self-hosted runner
    # runs-on: self-hosted
    # You can also specify a runner if you tagged the runners with a unique tag when you configured them.
    # Here we have unique env vars per CI server so we pin jobs to specific runners
    runs-on: ci-runner-1
    env:
      DATABASE_URL: ${{ secrets.DATABASE_URL_CI_SERVER_1 }}
      REDIS_URL: ${{ secrets.REDIS_URL_CI_SERVER_1 }}
      ELASTICSEARCH_URL: ${{ secrets.ELASTICSEARCH_URL_CI_SERVER_1 }}
    steps:
      - name: Checkout code
        uses: actions/checkout@v3
      - name: Cache node modules
        id: cache-npm
        uses: actions/cache@v3
        env:
          cache-name: cache-node-modules
        with:
          # npm cache files are stored in `~/.npm` on Linux/macOS
          path: ~/.npm
          key: ${{ runner.os }}-build-${{ env.cache-name }}-${{ hashFiles('**/package-lock.json') }}
          restore-keys: |
            ${{ runner.os }}-build-${{ env.cache-name }}-
            ${{ runner.os }}-build-
            ${{ runner.os }}-

      - if: ${{ steps.cache-npm.outputs.cache-hit == false }}
        name: List the state of node modules
        continue-on-error: true
        run: npm list

      - name: Install dependencies
        run: npm install

      - name: Setup gems
        run: bundle install

      - name: Build assets & prepare for tests
        run: |
          bin/rails db:reset
          bin/rails test:prepare
      - name: Confirm configured paths for Selenium Manager (compiled for ARM64 on the runner)
        run: |
          echo $PATH
          echo $SE_MANAGER_PATH
          chromium-browser --product-version
          chromedriver --version
      # Since 7.1 also runs `test:prepare` but we do it above in the build assets step. So use env var to skip.
      - name: Run tests
        run: |
          SKIP_JS_BUILD=1 SKIP_CSS_BUILD=1 bin/rails test

      - name: Lint
        run: bundle exec standardrb
      - name: Run security checks
        run: |
          bundle exec bundle-audit check --update
          bundle exec brakeman --run-all-checks --routes --no-pager --summary --no-progress --quiet -w3
  specs_first:
    name: "Specs - Group 'first'"
    runs-on: ci-runner-2
    env:
      DATABASE_URL: ${{ secrets.DATABASE_URL_CI_SERVER_2 }}
      REDIS_URL: ${{ secrets.REDIS_URL_CI_SERVER_2 }}
      ELASTICSEARCH_URL: ${{ secrets.ELASTICSEARCH_URL_CI_SERVER_2 }}
    steps:
      - name: Checkout code
        uses: actions/checkout@v3
      - name: Cache node modules
        id: cache-npm
        uses: actions/cache@v3
        env:
          cache-name: cache-node-modules
        with:
          # npm cache files are stored in `~/.npm` on Linux/macOS
          path: ~/.npm
          key: ${{ runner.os }}-build-${{ env.cache-name }}-${{ hashFiles('**/package-lock.json') }}
          restore-keys: |
            ${{ runner.os }}-build-${{ env.cache-name }}-
            ${{ runner.os }}-build-
            ${{ runner.os }}-

      - if: ${{ steps.cache-npm.outputs.cache-hit == false }}
        name: List the state of node modules
        continue-on-error: true
        run: npm list

      - name: Install dependencies
        run: npm install

      - name: Setup gems
        run: bundle install

      # Run test:prepare to build assets and email templates
      - name: Build assets & prepare for tests
        run: |
          bin/rails db:reset
          bin/rails test:prepare
      - name: Confirm configured paths for Selenium Manager (compiled for ARM64 on the runner)
        run: |
          echo $PATH
          echo $SE_MANAGER_PATH
          chromium-browser --product-version
          chromedriver --version
      # First group of specs
      - name: Run specs
        run: |
          bin/rails db:test:prepare
          bundle exec rspec --tag first_group
  specs_second:
    name: "Specs - Group 'second'"
    runs-on: ci-runner-3
    env:
      DATABASE_URL: ${{ secrets.DATABASE_URL_CI_SERVER_1 }}
      REDIS_URL: ${{ secrets.REDIS_URL_CI_SERVER_1 }}
      ELASTICSEARCH_URL: ${{ secrets.ELASTICSEARCH_URL_CI_SERVER_1 }}
    steps:
      - name: Checkout code
        uses: actions/checkout@v3
      - name: Cache node modules
        id: cache-npm
        uses: actions/cache@v3
        env:
          cache-name: cache-node-modules
        with:
          # npm cache files are stored in `~/.npm` on Linux/macOS
          path: ~/.npm
          key: ${{ runner.os }}-build-${{ env.cache-name }}-${{ hashFiles('**/package-lock.json') }}
          restore-keys: |
            ${{ runner.os }}-build-${{ env.cache-name }}-
            ${{ runner.os }}-build-
            ${{ runner.os }}-

      - if: ${{ steps.cache-npm.outputs.cache-hit == false }}
        name: List the state of node modules
        continue-on-error: true
        run: npm list

      - name: Install dependencies
        run: npm install

      - name: Setup gems
        run: bundle install

      # Run test:prepare to build assets and email templates
      - name: Build assets & prepare for tests
        run: |
          bin/rails db:reset
          bin/rails test:prepare
      - name: Confirm configured paths for Selenium Manager (compiled for ARM64 on the runner)
        run: |
          echo $PATH
          echo $SE_MANAGER_PATH
          chromium-browser --product-version
          chromedriver --version
      # Second group of specs
      - name: Run specs
        run: |
          bin/rails db:test:prepare
          bundle exec rspec --tag second_group
      # Run specs with no group
      - name: Run specs which we forgot to group
        run: |
          bundle exec rspec --tag ~first_group --tag ~second_group